
Picking
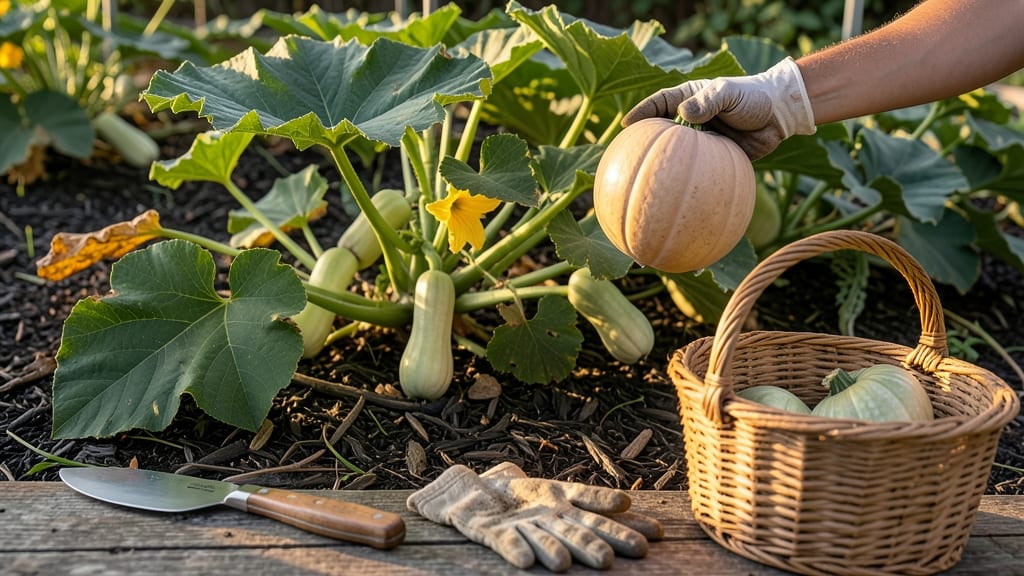
To pick butternut squash from your garden at the perfect moment means capturing its peak sweetness and texture before it spoils or loses flavor.
Picture this: you’ve nurtured your 🎃 from a tiny seedling to a sprawling vine, and now the moment of truth arrives—when to harvest. One wrong move, and you’re left with squash that’s either too hard or too soft, neither of which tastes like the golden, nutty treasure you imagined.
The key? Timing it right.
You’ll learn the three foolproof signs to watch for—skin color, stem condition, and weight—plus how to adjust for your USDA Zone 6 climate. Whether you’re a first-time grower or a seasoned gardener, these cues will help you avoid the most common mistakes that turn great harvests into disappointing ones.
Once you’ve mastered the harvest, I’ll share how to cure and store your squash so it lasts through winter—because the real magic isn’t just in picking it at the right time, but in savoring it for months to come.
3 Visual and physical signs your butternut squash is ready for harvest
Butternut squash reaches its peak flavor and storage potential when harvested at the right time. Unlike some squash varieties, these golden beauties give clear visual and physical cues that signal they’re ready to pick.
Ignoring these signs can lead to bland, watery flesh or squash that spoils too quickly. I’ve learned the hard way—overripe squash turns to mush faster than you’d think!
The most reliable indicators focus on three key areas: skin color and texture, stem condition, and fruit weight and density. Each of these factors works together to tell you whether your squash is ready for harvest.
For example, a squash with a hard, dull skin and a dry stem is almost always perfect for picking, while one that’s still soft or shiny needs more time on the vine.
Here’s how to spot these signs with confidence, plus a side-by-side comparison to help you avoid common mistakes. Paying attention to these details ensures you’ll enjoy sweet, nutty squash that lasts through winter—no guesswork required!
Pro Tip: Always harvest on a dry day to prevent soil from sticking to the skin, which can lead to rot during storage. Use a sharp knife or pruning shears to cut the stem, leaving about 1-2 inches of stem attached to the squash.
| Sign | Not Ready (Pick Too Early) | Ready (Perfect Harvest Time) |
|---|---|---|
| Skin Color | Green or pale yellow 🟢 | Dull tan or orange 🟡 |
| Skin Texture | Soft, easy to pierce 🔍 | Hard, difficult to puncture ⚖️ |
| Stem Condition | Green and plump 🌿 | Dry and shriveled 💀 |
| Fruit Weight | Light for size ⚖️ | Heavy and dense 💪 |
| Seed Development | Seeds not fully formed | Seeds mature but not overripe |
The skin color is your first clue—when butternut squash transitions from green to a dull tan or orange hue, it’s a clear sign ripening is underway. However, don’t confuse this with the shiny, waxy skin of unripe squash.
A ripe squash’s skin will feel rough and matte, almost like sandpaper, and it should resist pressure from your fingernail.
Next, check the stem. A healthy, ripe butternut squash will have a stem that’s dry and papery, almost like it’s starting to mummify. If the stem is still green and firm, the squash needs more time.
This is a critical sign because a dried stem indicates the squash has stopped growing and is ready to be harvested.
Finally, pick up the squash and assess its weight and density. A ripe butternut squash feels surprisingly heavy for its size, almost like it’s packed with dense, sweet flesh.
If it feels light or hollow when lifted, it’s not ready yet. This weight is a direct result of the starch conversion happening inside the fruit as it ripens.
One mistake I made early in my gardening journey was harvesting squash based solely on size. I thought bigger always meant better, but some of my largest butternut squash were underripe and had poor flavor.
Always prioritize these three visual and physical signs over size alone. Your taste buds—and your pantry—will thank you!
After harvesting, let your butternut squash cure in the sun for 10-14 days to harden the skin further and extend storage life. Place them in a dry, well-ventilated spot out of direct sunlight. This step is non-negotiable if you want your squash to last through winter.
If you’re unsure whether your squash is ready, err on the side of caution and wait another 3-5 days. Overripe squash can develop soft spots and rot quickly, while underripe squash simply won’t taste as sweet or store as long.
With these signs in mind, you’ll never second-guess your harvest again!
Now that you know how to spot the perfect butternut squash, you’re ready to enjoy its nutty, caramel-like flavor in soups, roasted dishes, or baked goods. Happy harvesting!
How long does it take for butternut squash to ripen? Timeline and seasonal factors
Butternut squash typically takes 80 to 100 days to reach full ripeness from planting, though this can vary based on your climate and the specific variety. Most gardeners plant seeds in late spring (April-May), aiming for a fall harvest (September-October) before the first frost.
This timeline ensures you capture that perfect balance of sweetness and storage potential.
Your local climate plays a huge role in ripening speed. In warmer southern regions (USDA Zones 8-10), butternut squash may mature in as few as 75 days, while cooler northern zones (Zones 4-6) might need the full 100 days or longer.
Always check your seed packet for variety-specific recommendations—some heirloom types can take up to 120 days.
| Stage | Key Characteristics | Days from Planting |
|---|---|---|
| Germination | Sprouts appear 7-14 days | 7-14 |
| Vine Establishment | Leaves fully unfurl, vines 2-3 ft | 21-30 |
| Flowering | Yellow blooms appear (male/female) | 30-45 |
| Fruit Development | Squash grows rapidly, skin hardens | 45-70 |
| Harvest Ready | Skin dull, stem dry, heavy for size | 80-100 |
If you're planting in late summer (July-August) for a winter harvest, expect a shorter growing season. In this case, choose fast-maturing varieties like 'Waltham Butternut' (80 days) or 'Gold Rush' (85 days) to ensure ripeness before cold weather sets in.
Always adjust your planting date by checking your frost-free days—aim for at least 90 days of warm weather.
Seasonal factors like temperature fluctuations and daylight hours can slow ripening. If summer heat waves stress your plants, they may take 10-15 extra days to mature.
Conversely, consistent warmth and 6+ hours of sunlight daily will accelerate growth. Monitor your plants closely during these periods to avoid overripe or underripe harvests.
To maximize your harvest window, consider succession planting in mild climates. Plant a second batch 4-6 weeks after your first to stagger ripening and extend your fresh squash supply. This works especially well in USDA Zones 7-10, where frost dates are later or nonexistent.
Remember, butternut squash won't ripen further after picking, so timing is everything. Use the 80-100 day rule as a guideline, but always prioritize visual cues like skin hardness and stem dryness over calendar dates. With the right approach, you'll enjoy homegrown butternut squash at its peak flavor and storage potential.