
Picking
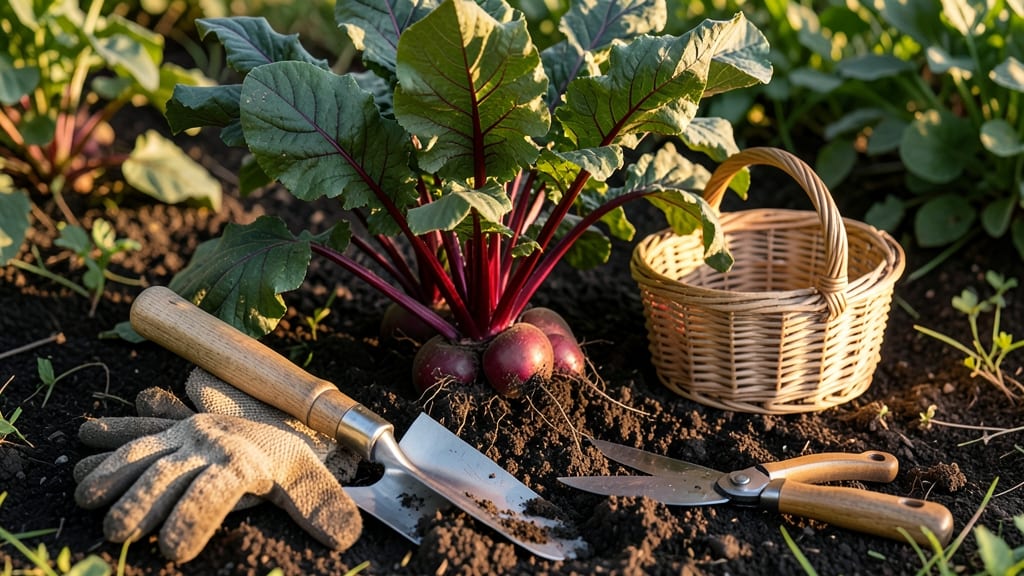
Harvesting beets from your garden at the right time ensures tender, sweet roots that taste like summer in every bite 🍠 — but figuring out when they’re ready can be tricky.
You’ve probably pulled a beet only to find it tough or woody, and that’s because timing is everything. The secret? A simple soil check that reveals peak sweetness before the beet even knows it’s being picked.
In this guide, I’ll walk you through how to test for maturity by size, color, and soil resistance, so you never miss the window between perfect tenderness and overripe disappointment.
You’ll also learn the best time of day to harvest, how seasonal factors affect flavor, and how to store your beets so they stay fresh for weeks after the garden is done.

How to perform the soil check test for beet harvest timing
Knowing when to harvest beets isn't about guessing days after planting—it's about reading the soil and root signals hidden beneath the surface. The soil check test is my foolproof method to determine beet maturity by combining root size, color, and soil resistance.
This simple technique works for both baby beets (1-2 inches) and full-sized roots (3+ inches), ensuring peak flavor and texture every time.
Beets mature at different rates based on variety, soil conditions, and climate. For example, 'Detroit Dark Red' typically reaches harvest in 55-60 days, while 'Babybeat' varieties are ready in just 35-40 days.
However, these timelines are just starting points—the real magic happens when you dig deeper (literally) to confirm readiness. The soil check test accounts for variables like moisture levels and organic matter, which can accelerate or slow root development.
Step-by-Step Soil Check Test for Beet Harvest Timing
-
Step 1: Choose a representative sample
Select 3-5 beets from different parts of your bed. Avoid edge plants, as they may grow unevenly due to soil compaction or root competition. -
Step 2: Loosen the soil
Use a hand trowel to gently loosen the soil around the beet's base. Work in a 1-inch radius to avoid damaging nearby roots. Aim for a 3-4 inch depth—this is where the root bulb forms. -
Step 3: Check root size
Gently expose 1-2 inches of the root. For baby beets, look for roots 1-2 inches wide. For full-sized beets, aim for 3-4 inches in diameter. If roots are smaller than expected, wait 5-7 more days and retest. -
Step 4: Assess color and firmness
Examine the root's color—it should match the variety (e.g., deep crimson red for 'Detroit', golden yellow for 'Golden'). Press the root gently with your thumb: it should feel firm but slightly yielding, like a ripe avocado. If it's soft or mushy, it's overripe. -
Step 5: Test soil resistance
Wiggle the beet slightly in the soil. If it resists gently (like pulling a carrot), it's ready. If it slides out easily, it's underripe. If it breaks or cracks the soil with force, it's past its prime. -
Step 6: Compare to leaf health
Check the top leaves: they should be large, dark green, and vigorous. If leaves are yellowing or wilting, the beet may be overripe. If they're still small, the root needs more time. -
Step 7: Decide on harvest timing
For baby beets, harvest when roots are 1-2 inches wide and tender. For full-sized beets, wait until roots reach 3-4 inches with deep color. In hot climates, harvest earlier to avoid woodiness.
One common mistake gardeners make is harvesting beets based solely on days after planting. While seed packets provide estimates, soil conditions can drastically alter maturity timelines. For example, sandy soil drains quickly and may produce smaller roots faster, while clay soil can slow growth but yield larger, firmer beets.
That's why the soil check test is indispensable—it adapts to your specific growing conditions.
Pro tip: If you're growing multi-colored beets (like 'Chioggia'), use the soil test to check for uniform coloration. The rings should be distinct and vibrant, not faded or muddy.
For heirloom varieties, such as 'Albina Vereduna' (white beets), the roots should be pure white with no greenish tint, which indicates stress or overmaturity.
Timing your harvest correctly also affects storage life. Beets harvested at peak maturity store 3-4 weeks in the fridge, while overripe or underripe beets spoil faster. To maximize storage, harvest in the early morning when temperatures are coolest, and trim the greens immediately—leaving them attached accelerates spoilage.
For gardeners in Zone 6a (like me!), I've found that late summer plantings (July-August) often produce sweeter beets because cooler fall temperatures slow growth, allowing more sugar development.
Use the soil check test to monitor progress, and don't hesitate to harvest in stages—this extends your harvest window and ensures you always have fresh beets.
Remember, the soil check test isn't just about root size—it's about holistic maturity. A beet that passes the test will have tender flesh, intense flavor, and minimal fiber. Skip the guesswork and dig in for a harvest that's always perfectly timed.
Signs your beets are overripe (and how to fix it)
Beets left too long in the ground transform from tender treats to tough, fibrous messes—sometimes without warning. The key is recognizing 3 critical signs of overripeness: wooden texture, cracked skin, and bitter flavor.
These red flags appear after 70+ days of growth, when beets prioritize seed production over root development. Even worse, overripe beets attract pests like carrot rust flies, turning your harvest into a buffet instead of a meal.
First, check the root's texture. A perfectly ripe beet should yield slightly when pressed but bounce back—like a firm apple. Overripe beets feel hard and woody, almost like biting into a carrot that’s been left in the pantry too long.
This happens when starches convert to sugars and then to fiber, making them unpalatable. The leafy greens also give clues: yellowing or wilting tops signal the plant is redirecting energy away from root growth.
Next, examine the skin condition. Healthy beets have smooth, vibrant skin matching their variety—deep red, golden yellow, or purple. But when beets overripen, their skin develops cracks (from rapid expansion) or wrinkles (from moisture loss).
These imperfections let in dirt and bacteria, making storage risky. Worse yet, cracked beets often split open entirely when pulled, leaving you with a messy, unusable harvest.
🚨 Overripe Beet Warning Signs
Don’t ignore these red flags—your harvest is at risk!
- 🌱 Woody Texture: Roots feel hard and fibrous when pressed
- 💧 Cracked Skin: Visible splits or deep wrinkles on the surface
- 🌡️ Bitter Taste: Flavor turns harsh and unpleasant
- ⏰ Past 70 Days: Beets left in ground beyond ideal harvest window
🔧 Fix It: Thin seedlings earlier to space plants properly (2-3" apart) and harvest at 55-60 days for peak tenderness.
If you’ve missed the ideal harvest window, don’t despair—overripe beets can still be salvaged. First, trim the leafy greens down to 2 inches above the root, which forces the plant to redirect energy back into the root.
Then, water deeply and fertilize lightly with a high-phosphorus blend (like 5-10-10) to encourage root regrowth. This method works best for golden or red varieties, which tolerate stress better than heirloom types.
To prevent overripeness next season, adjust your planting schedule. Beets thrive in cool weather (50-75°F), so avoid planting in late summer when temperatures climb. Instead, opt for early spring or late summer sowings (6-8 weeks before your first frost) to ensure harvests coincide with cooler months.
Amending soil with compost also speeds up growth—aim for 1-2 inches of organic matter mixed into the top 6 inches of soil before planting.
For baby beets (harvested at 1-2 inches), set reminders to check roots every 30-40 days—they overripen faster than full-sized varieties. Use a soil probe to gently loosen roots before pulling to avoid damaging neighboring plants.
Store harvested beets in a cool (32-35°F), humid (95%) environment for up to 3 weeks, or blanch and freeze for long-term use. With these adjustments, you’ll never again face the disappointment of a woody, bitter beet again.