
Tools
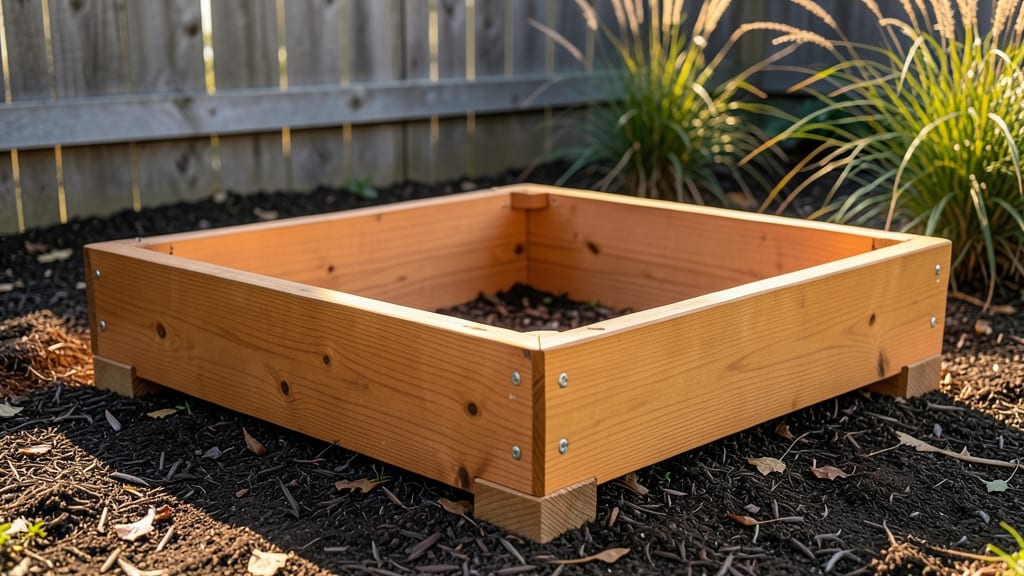
A 2x4 raised garden bed built with precise plans transforms even the toughest yard into a productive vegetable patch—no heavy digging required.
Picture this: a sturdy 4x8-foot frame assembled in under 2 hours, ready to hold 12 inches of rich soil where your 🥬 will thrive. The key? Using galvanized screws and corner brackets to lock the lumber together, so wind and rain can’t shift it over time.
Most gardeners overlook drainage holes or skip the cedar lining—both critical for longevity. My first bed collapsed after two summers because I cut corners on hardware. You won’t make that mistake with these step-by-step plans.
Inside, you’ll find a material checklist to avoid overbuying, plus three height options (12", 18", or 24") so you can customize for seating, accessibility, or deep-rooted crops. Let’s build something that lasts.
Step-by-step 2x4 raised garden bed construction guide
A 4x8-foot raised garden bed built with 2x4 lumber delivers the perfect balance of affordability and durability. Whether you're growing tomatoes, peppers, or herbs, this design elevates your plants above soil-borne diseases while improving drainage and accessibility.
The key lies in precise measurements, sturdy connections, and weather-resistant materials—all achievable in under 2 hours with the right prep.
Before grabbing your circular saw and drill, let’s break this down into manageable steps. We’ll cover everything from material selection to securing your bed against wind and pests.
Pro tip: Use galvanized screws for longevity, especially if your bed sits in a damp climate. Let’s get started with the essentials.
Step-by-Step Construction Guide
- 1 Gather Materials: 12 pieces of 2x4 lumber (8 ft long), 16 2.5-inch deck screws, 4 corner braces, and 1 tarp or landscape fabric for the base.
- 2 Cut Lumber: Rip 4 pieces to 4 feet (length) and 4 pieces to 8 feet (width). For height, cut 4 pieces to your desired bed height (typically 10-12 inches for easy access).
- 3 Assemble the Frame: Lay out the 4-foot pieces as the short ends and screw them to the 8-foot pieces using 3 screws per corner. Pre-drill holes to prevent splitting.
- 4 Add Corner Braces: Attach L-brackets to the inside of each corner for extra stability. This prevents the frame from racking over time.
- 5 Attach Side Panels: Screw the vertical 2x4 pieces to the inside of the frame to create the bed walls. Space them 12 inches apart for easy soil filling.
- 6 Line the Base: Place landscape fabric or a tarp inside the bed to block weeds and improve drainage. Secure it with staples to the underside of the frame.
- 7 Fill with Soil: Layer 2 inches of gravel at the bottom, followed by a mix of topsoil, compost, and permanent bed mulch. Aim for 6-12 inches of soil depth for most vegetables.
- 8 Secure the Bed: Bury the bottom 2 inches of the frame in soil or anchor it with concrete footings if wind is a concern. This keeps it level and prevents tipping.
Now that your frame is assembled, let’s talk about customization options to extend your bed’s lifespan. If you’re in a humid climate, consider treating the wood with a non-toxic sealant to prevent rot.
For added longevity, swap out untreated pine for cedar or redwood, which naturally resist moisture and pests. Just be prepared to invest a bit more upfront.
One of my favorite upgrades is adding built-in trellises along the long sides. Simply attach
Cost-saving material alternatives for 2x4 raised beds
Standard 2x4 lumber is the go-to choice for raised beds, but its cost can add up quickly—especially for larger gardens. Fortunately, several durable and budget-friendly alternatives exist that won’t sacrifice longevity or stability.
Whether you’re working with cedar, composite wood, or repurposed materials, these options can cut costs by 30-50% while keeping your bed sturdy for years.
Before swapping materials, consider your local climate and moisture exposure. Coastal areas or rainy seasons demand rot-resistant woods, while dry climates allow for more flexibility.
I’ve tested these alternatives in my own garden and found that cedar and composite lumber last nearly as long as pressure-treated wood—without the chemical concerns.
Here’s how these alternatives compare in terms of cost, durability, and maintenance:
| Material | Cost per Board Foot | Durability (Years) | Rot Resistance | Maintenance Needed |
|---|---|---|---|---|
| Pressure-Treated Pine (Standard) | $1.20 - $1.80 | 5 - 10 | Moderate (Chemical Treatment) | Low (Seal annually) |
| Cedar | $1.80 - $2.50 | 10 - 15 | High (Natural Resins) | None (Stain every 3-5 years) |
| Composite Wood (e.g., Trex) | $2.50 - $4.00 | 15 - 25 | Very High (No Wood) | None (Clean occasionally) |
| Recycled Plastic Lumber | $2.00 - $3.50 | 20 - 30 | Very High (No Decomposition) | None (UV-resistant) |
| Salvaged Wood (Untreated) | $0.50 - $1.20 | 3 - 7 | Low (Needs Treatment) | High (Seal + repaint yearly) |
For the best value, I recommend cedar if you want a natural wood option—it’s naturally rot-resistant and requires minimal upkeep. If you’re building for long-term durability, composite lumber or recycled plastic will outlast traditional wood by years, though the upfront cost is higher.
My 4x8-foot cedar bed has lasted 8 years with only a single stain refresh.
To extend the lifespan of any material, apply a waterproof sealant before assembly and add landscape fabric between the wood and soil. This double-layer protection blocks moisture and pests, adding 2-5 extra years to your bed’s life.
I also recommend elevating beds 6-12 inches off the ground to improve airflow and drainage.
For ultra-budget builds, check local habitat restoration programs or construction sites for free or discounted salvaged wood. Just ensure it’s untreated and dry—soaking in water or chemical solutions will ruin it.
With the right material and care, your raised bed frame can last decades while keeping costs low.